Introduction
In today’s tech landscape, Kubernetes has become synonymous with scalable and resilient application hosting. But what happens when you combine it with the relatively humble task of hosting a static blog? Well, I went down that rabbit hole and set up this blog on a bare-metal Kubernetes cluster. To be exact, this is the second time I have done this. After switching back and forth between various content management systems for blogs, I have decided it was finally time to move back to a static quarto site, hosted on good old K8s.
Could I have done this with GitHub Pages? Sure. Did I want to take the long (and more complicated) route? Absolutely.
Let me walk you through my experience setting up a Kubernetes-powered blog, and how it all came together.
Design Goals
From the outset, I had some design goals for this project:
- Cost-effectiveness: I wanted the whole setup to be cheap. No managed Kubernetes, no fancy cloud providers — just affordable VMs running the underlying Kubernetes nodes.
- Continuous deployment: Any push to the blog’s master branch in GitHub should automatically deploy the latest blog content.
- Notebooks integration: There also exists another repository where I store rather raw, uncommented experiments in Jupyter notebooks, too. Despite them being mostly code-only, I found that they might still be interesting to read, so they should be included here as well. Thus, each deployment of the main blog should also copy and include all notebooks from this second repository.
- Simplicity: Although the underlying infrastructure is rather complex, deploying and updating the blog should be rather simple. This means, ideally, no crazy CRD extensions but only out-of-the-box Kubernetes resources where possible.
Kubernetes Cluster Setup
Node Setup
Since managed Kubernetes was out of the question, I opted for a bare-metal Kubernetes setup with VMs. I rented three virtual machines from Contabo, a fairly budget-friendly hosting provider (no affiliation on my end). While they are not the most reliable VM provider and spinning up a new VM takes quite some time, they are cheap and things are working nicely most of the time.
With three machine as cluster nodes, I created one master and two worker nodes. This obviously doesn’t ensure high availability at all but keep in mind that we are still talking about a personal blog and not a critical production environment.
To automate some initial configuration, I created an Ansible playbook. The primary advantage here is being able to quickly tear down and rebuild the entire setup if necessary. As managing all necessary firewall configurations between the VMs turned out to be quite tedious, I also used WireGuard to set up a virtual network overlay. On the one hand, this adds some additional communication overhead. On the other hand, this only left the WireGuard port to worry about regarding communication amongst the cluster nodes.

Cluster Setup
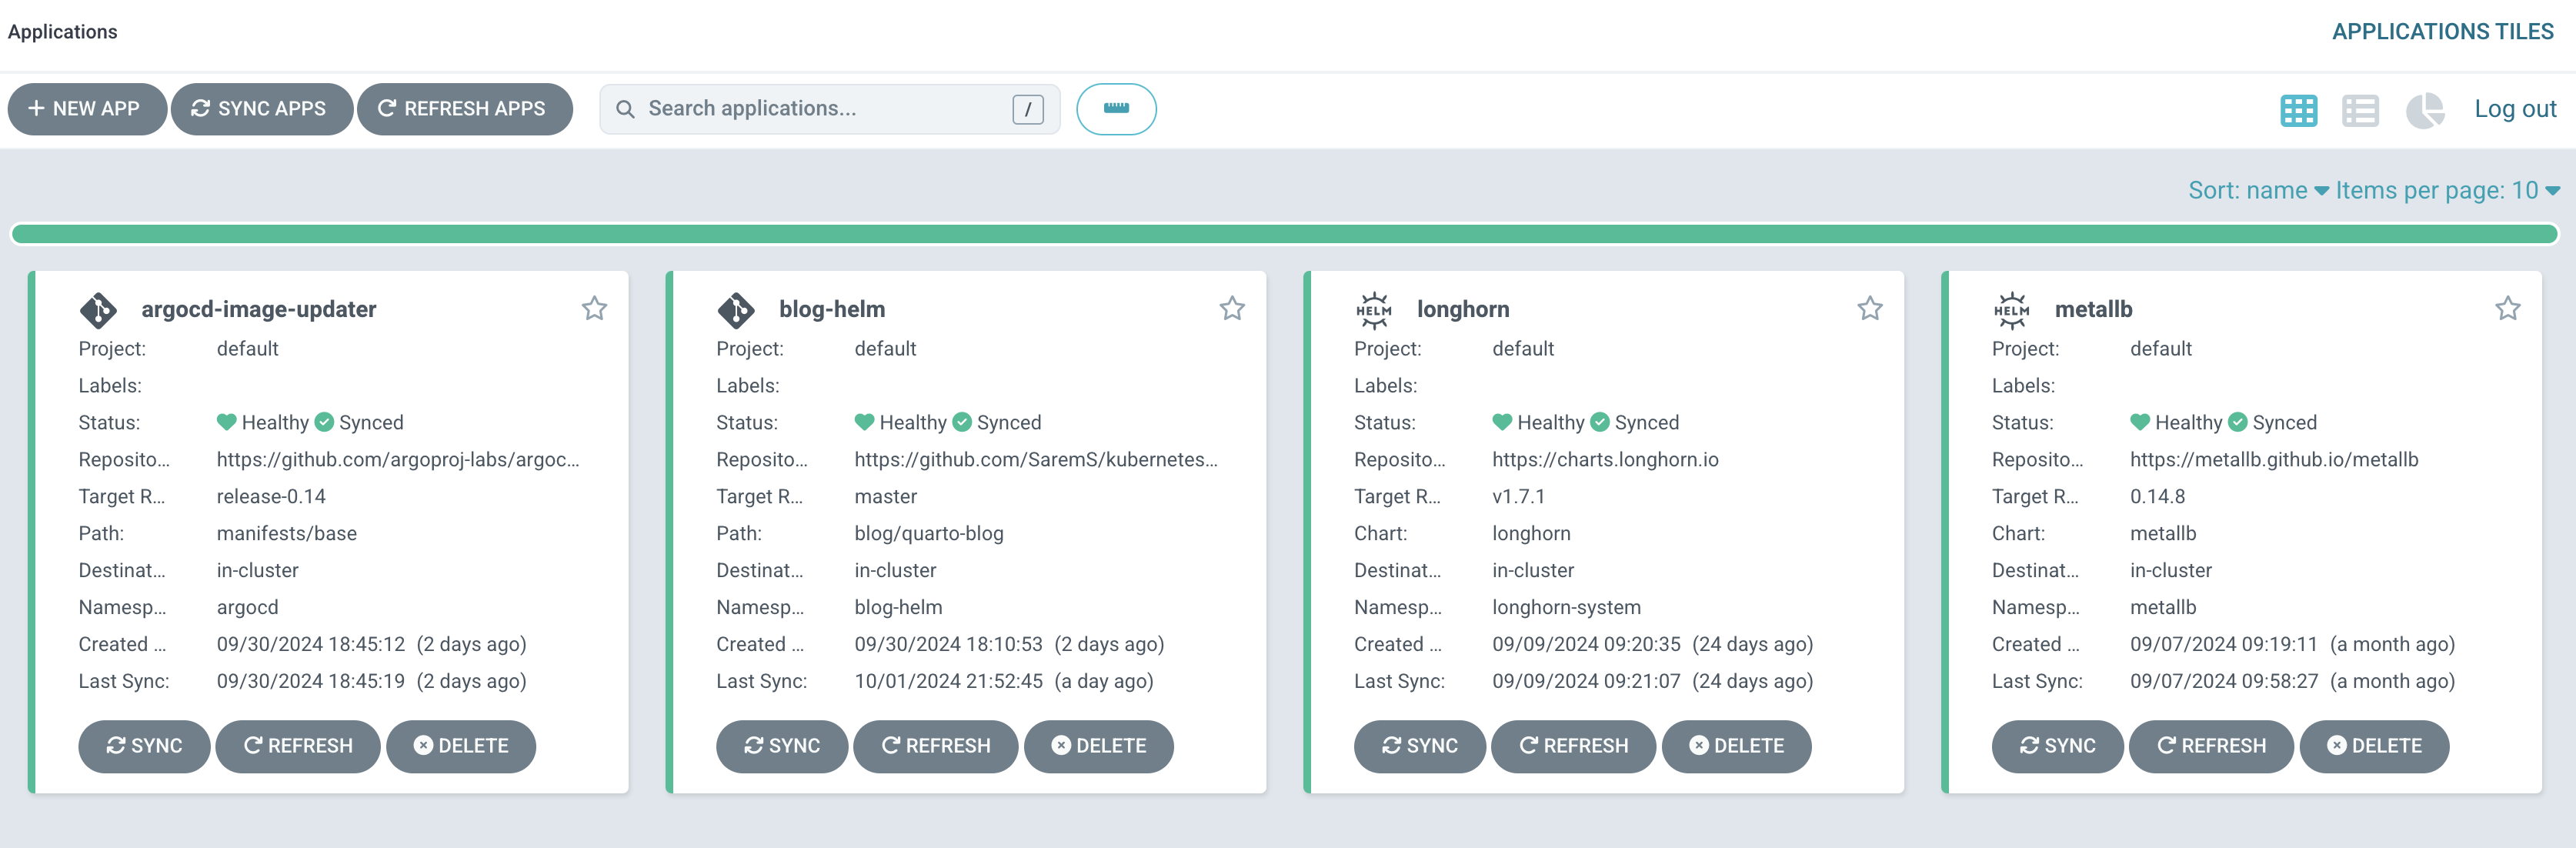
For the Kubernetes cluster, I initially tried a raw kubeadm setup, but configuring Cilium as the CNI turned out to be much harder than expected. Accepting my defeat (for now), I went with Rancher’s RKE2 and things went relatively smooth from there. Installing ArgoCD then completed the, more or less, manual parts of the set-up. Every other installation is now managed by Argo.
Although persistent storage is not necessary at this point, I did some experiments that required setting up PVCs. As this is already an RKE2 cluster, it made sense to use Longhorn which was also reasonably straightforward to install.
Finally, to enable external traffic, I added metallb to the Kubernetes cluster and installed nginx to the control plane VM. Nginx then accepts external traffic and performs a proxy pass to the exposed metallb services.

You can find all cluster-wide ArgoCD installations here.
Hosting the Blog on Kubernetes
Now that the cluster was up and running, it was time to host the actual blog. Remember that an important goal is to keep the manual effort for deploying new edits at a minimum. As described by the quarto docs, the probably easiest way to host and deploy quarto sites is via GitHub. A simple GitHub Actions pipeline would be sufficient here to auto-deploy any updates to the underlying notebooks.
Since I want to keep open the option to add non-static functionality later on, this approach is unfortunately out of question. Rather, the implied automatism needs to be transferred to the more complex Kubernetes setup. At least I wanted to avoid having to manually update some image tag in the ArgoCD deployment, whenever I edited the blog.
First, I was playing around with a small customization of the git-sync image. The idea was to let the git-sync container poll for new commit in the blog repo and then trigger a Kubernetes Job to re-render the quarto files. The advantage here was that the repository containing the blog files only had to contain the notebooks and the quarto yaml files. In essence, the blog would have been more or less completely decoupled from any infrastructure or deployment assumptions. There was also still the issue of incorporating the notebooks from the other repository.
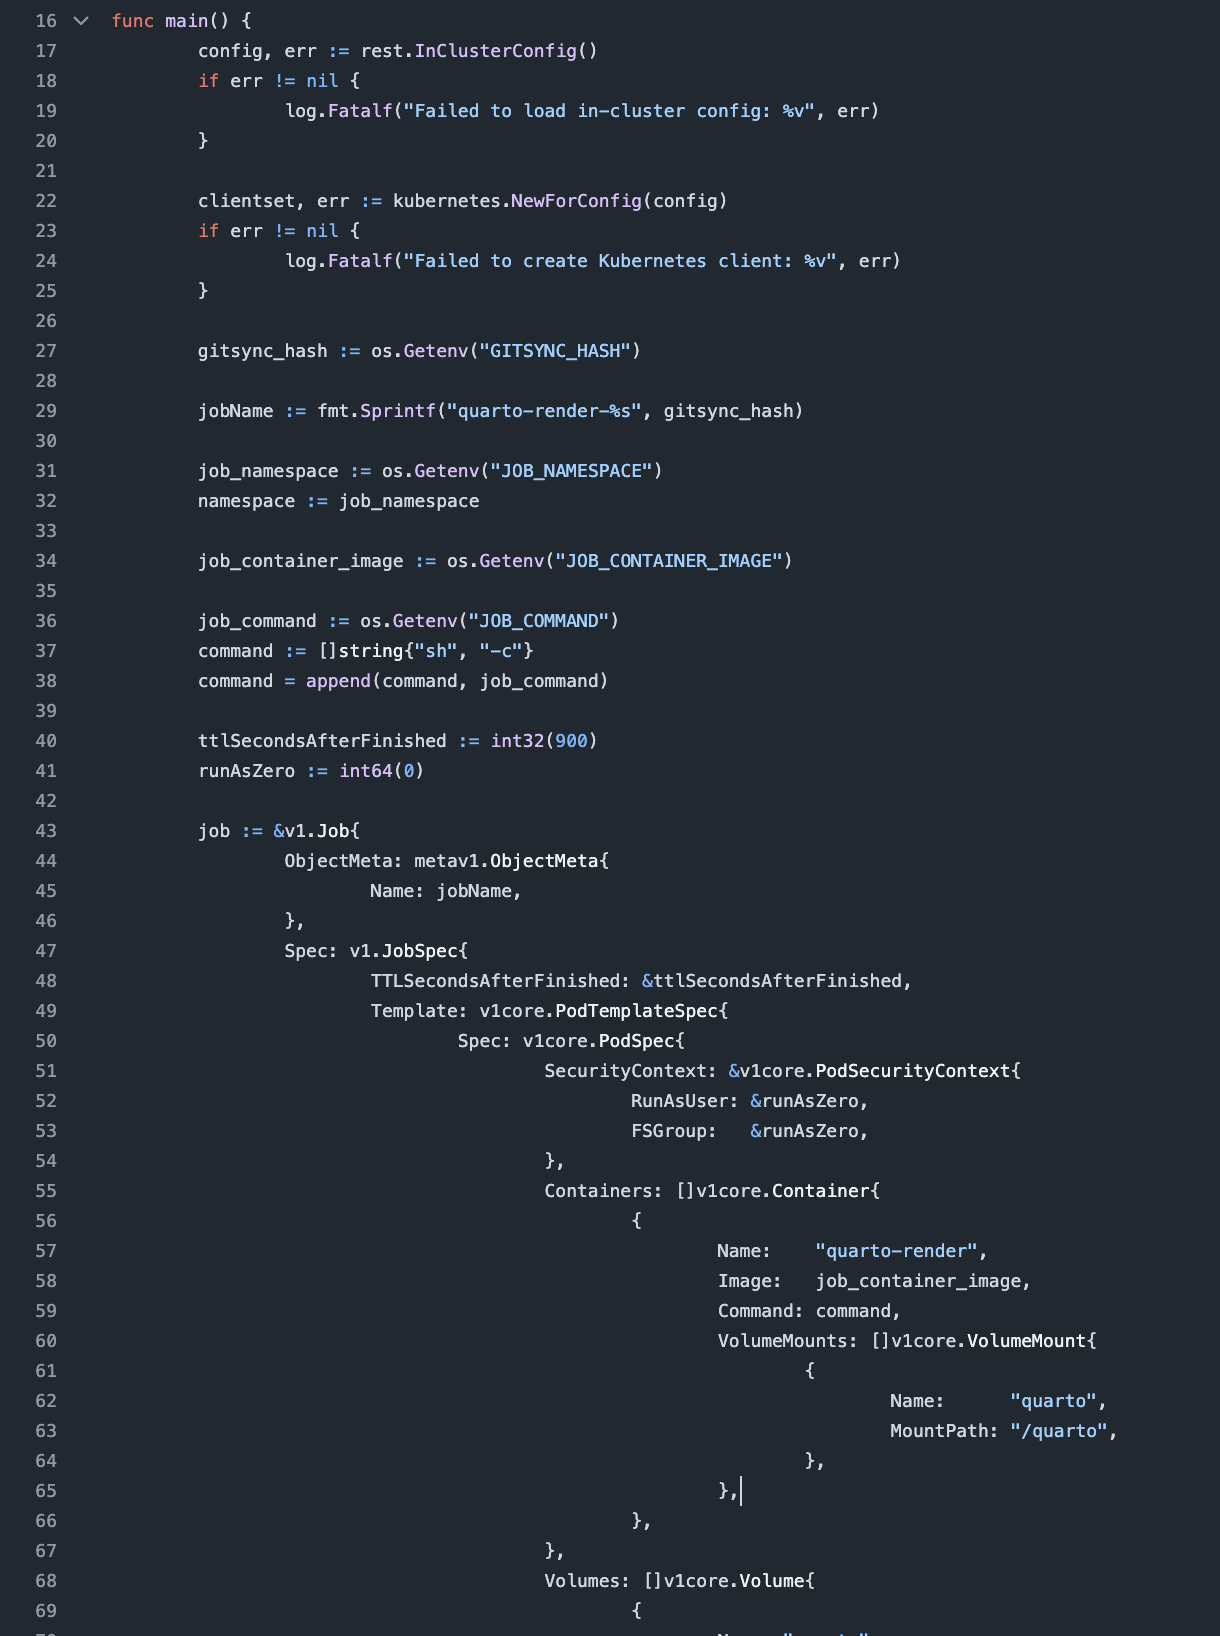
At some point, I realized that this is unnecessarily complex, so I decided to go with a single container that ultimately exposes a Caddy static file server. You can find the whole build process in the GitHub-Actions configuration and the corresponding Dockerfile.
Now, whenever the blog is updated, a new blog image is built and tagged with the current datetime. Inside the build process, we add the notebooks from the second repository and slightly modifies the quarto configuration to include those additional files. Vice versa, whenever the second repository is updated, that repo remotely triggers the blog’s build process, too. This has been working nicely, without any issues so far.
To avoid manual updates to the image tags, I have also added the ArgoCD Image Updater. By simply adding the annotations,
annotations:
    argocd-image-updater.argoproj.io/image-list: blog=ghcr.io/sarems/blog
    argocd-image-updater.argoproj.io/blog.update-strategy: alphabetical
to the ArgoCD application yaml, the Image Updater automatically polls the ghcr.io image repository for updates.
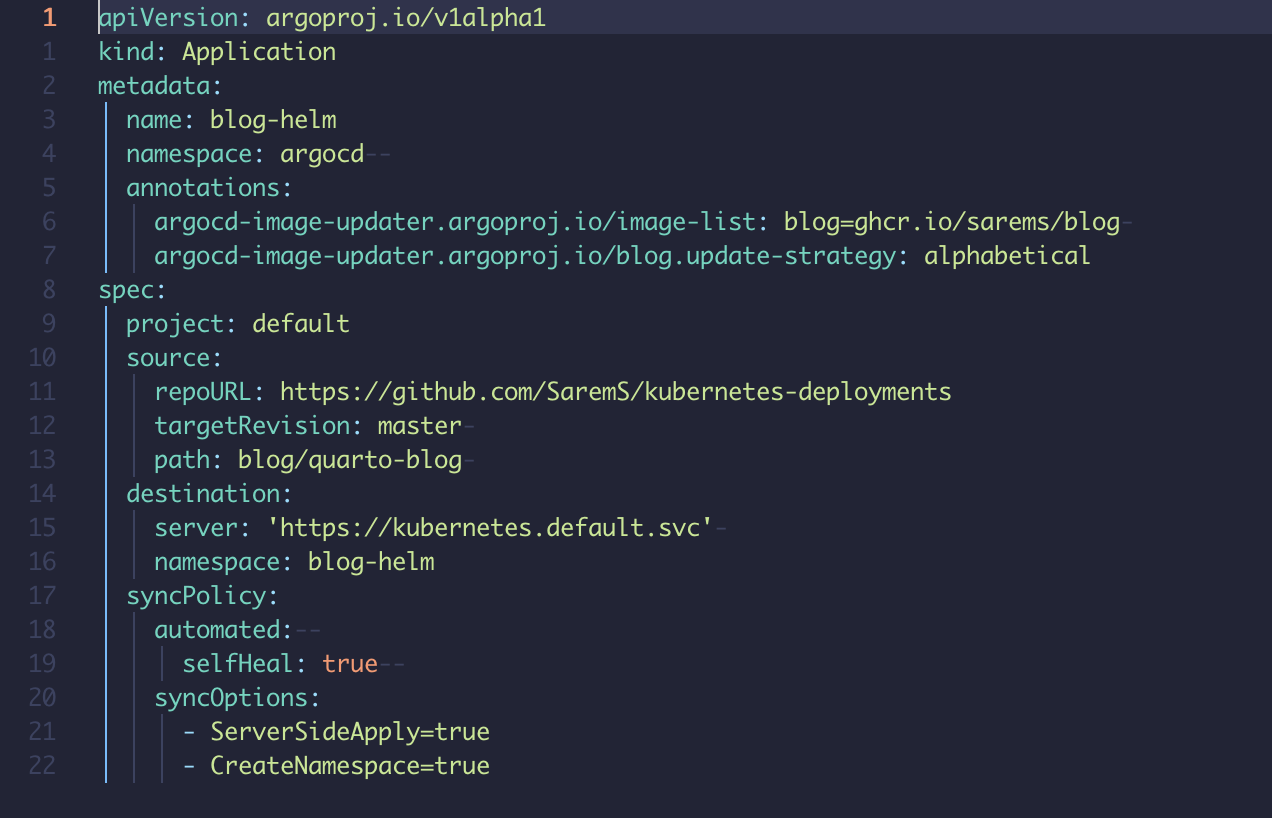
If it finds a new image, the Argo application is automatically updated to use the newer image. The only caveat is that ArgoCD deployment either needs to be done on a Helm chart or a Kustomization. Here, I went with a rather simple Helm chart.
Conclusion and takeaways
Could I have hosted this blog on GitHub Pages? Absolutely. But where’s the fun in that? At the very least, I have improved a bit on setting up Bare Metals clusters from scratch. I still see failing to set it up with raw kubeadm in time as a personal weakness, though…
Nevertheless, the whole setup has been running perfectly stable as of now. Keep in mind though that this is a rather small, personal blog with low traffic. Time will tell if this would keep up with larger traffic, but I am reasonably optimistic.
What is definitely cool with this approach is being able to host other applications on the cluster and then incorporating them in rendered notebooks. I have successfully tested this idea in an old version of this blog. Thus, I’ll hopefully soon find time to showcase more applied things on this blog rather than just writing about some theoretical model ideas.
If you have any questions or ideas for improvements, please feel free to write me an email. I’ll absolutely try to answer, but time is quite sparse these days.